Integrations
Bubble (Old)
Integrate Stripe Checkout with Bubble using PriceWell
| ⚠️ This documentation is outdated. View the Latest Bubble Documentation |
|---|

This page will walk you through integrating both the Pricing Page and Customer Portal with Bubble. We’ll go through:
- Embedding a Pricing Page in Bubble.
- Allowing a user to start a subscription once they are logged in.
- Displaying the Customer Portal once a user has a subscription.
- Reacting to subscription updates using Stripe Webhooks
Step 1: Create a Pricing Page and Customer Portal
See detailed instructions below:
How to create a Customer Portal
Step 2: Embed the Pricing Page in Bubble
Open the page you want to embed your pricing (this is usually a page where the user is already logged in like a Billing Admin page).
Add a new HTML element:

Copy the snippet from PriceWell. Be sure to choose the Existing Users snippet
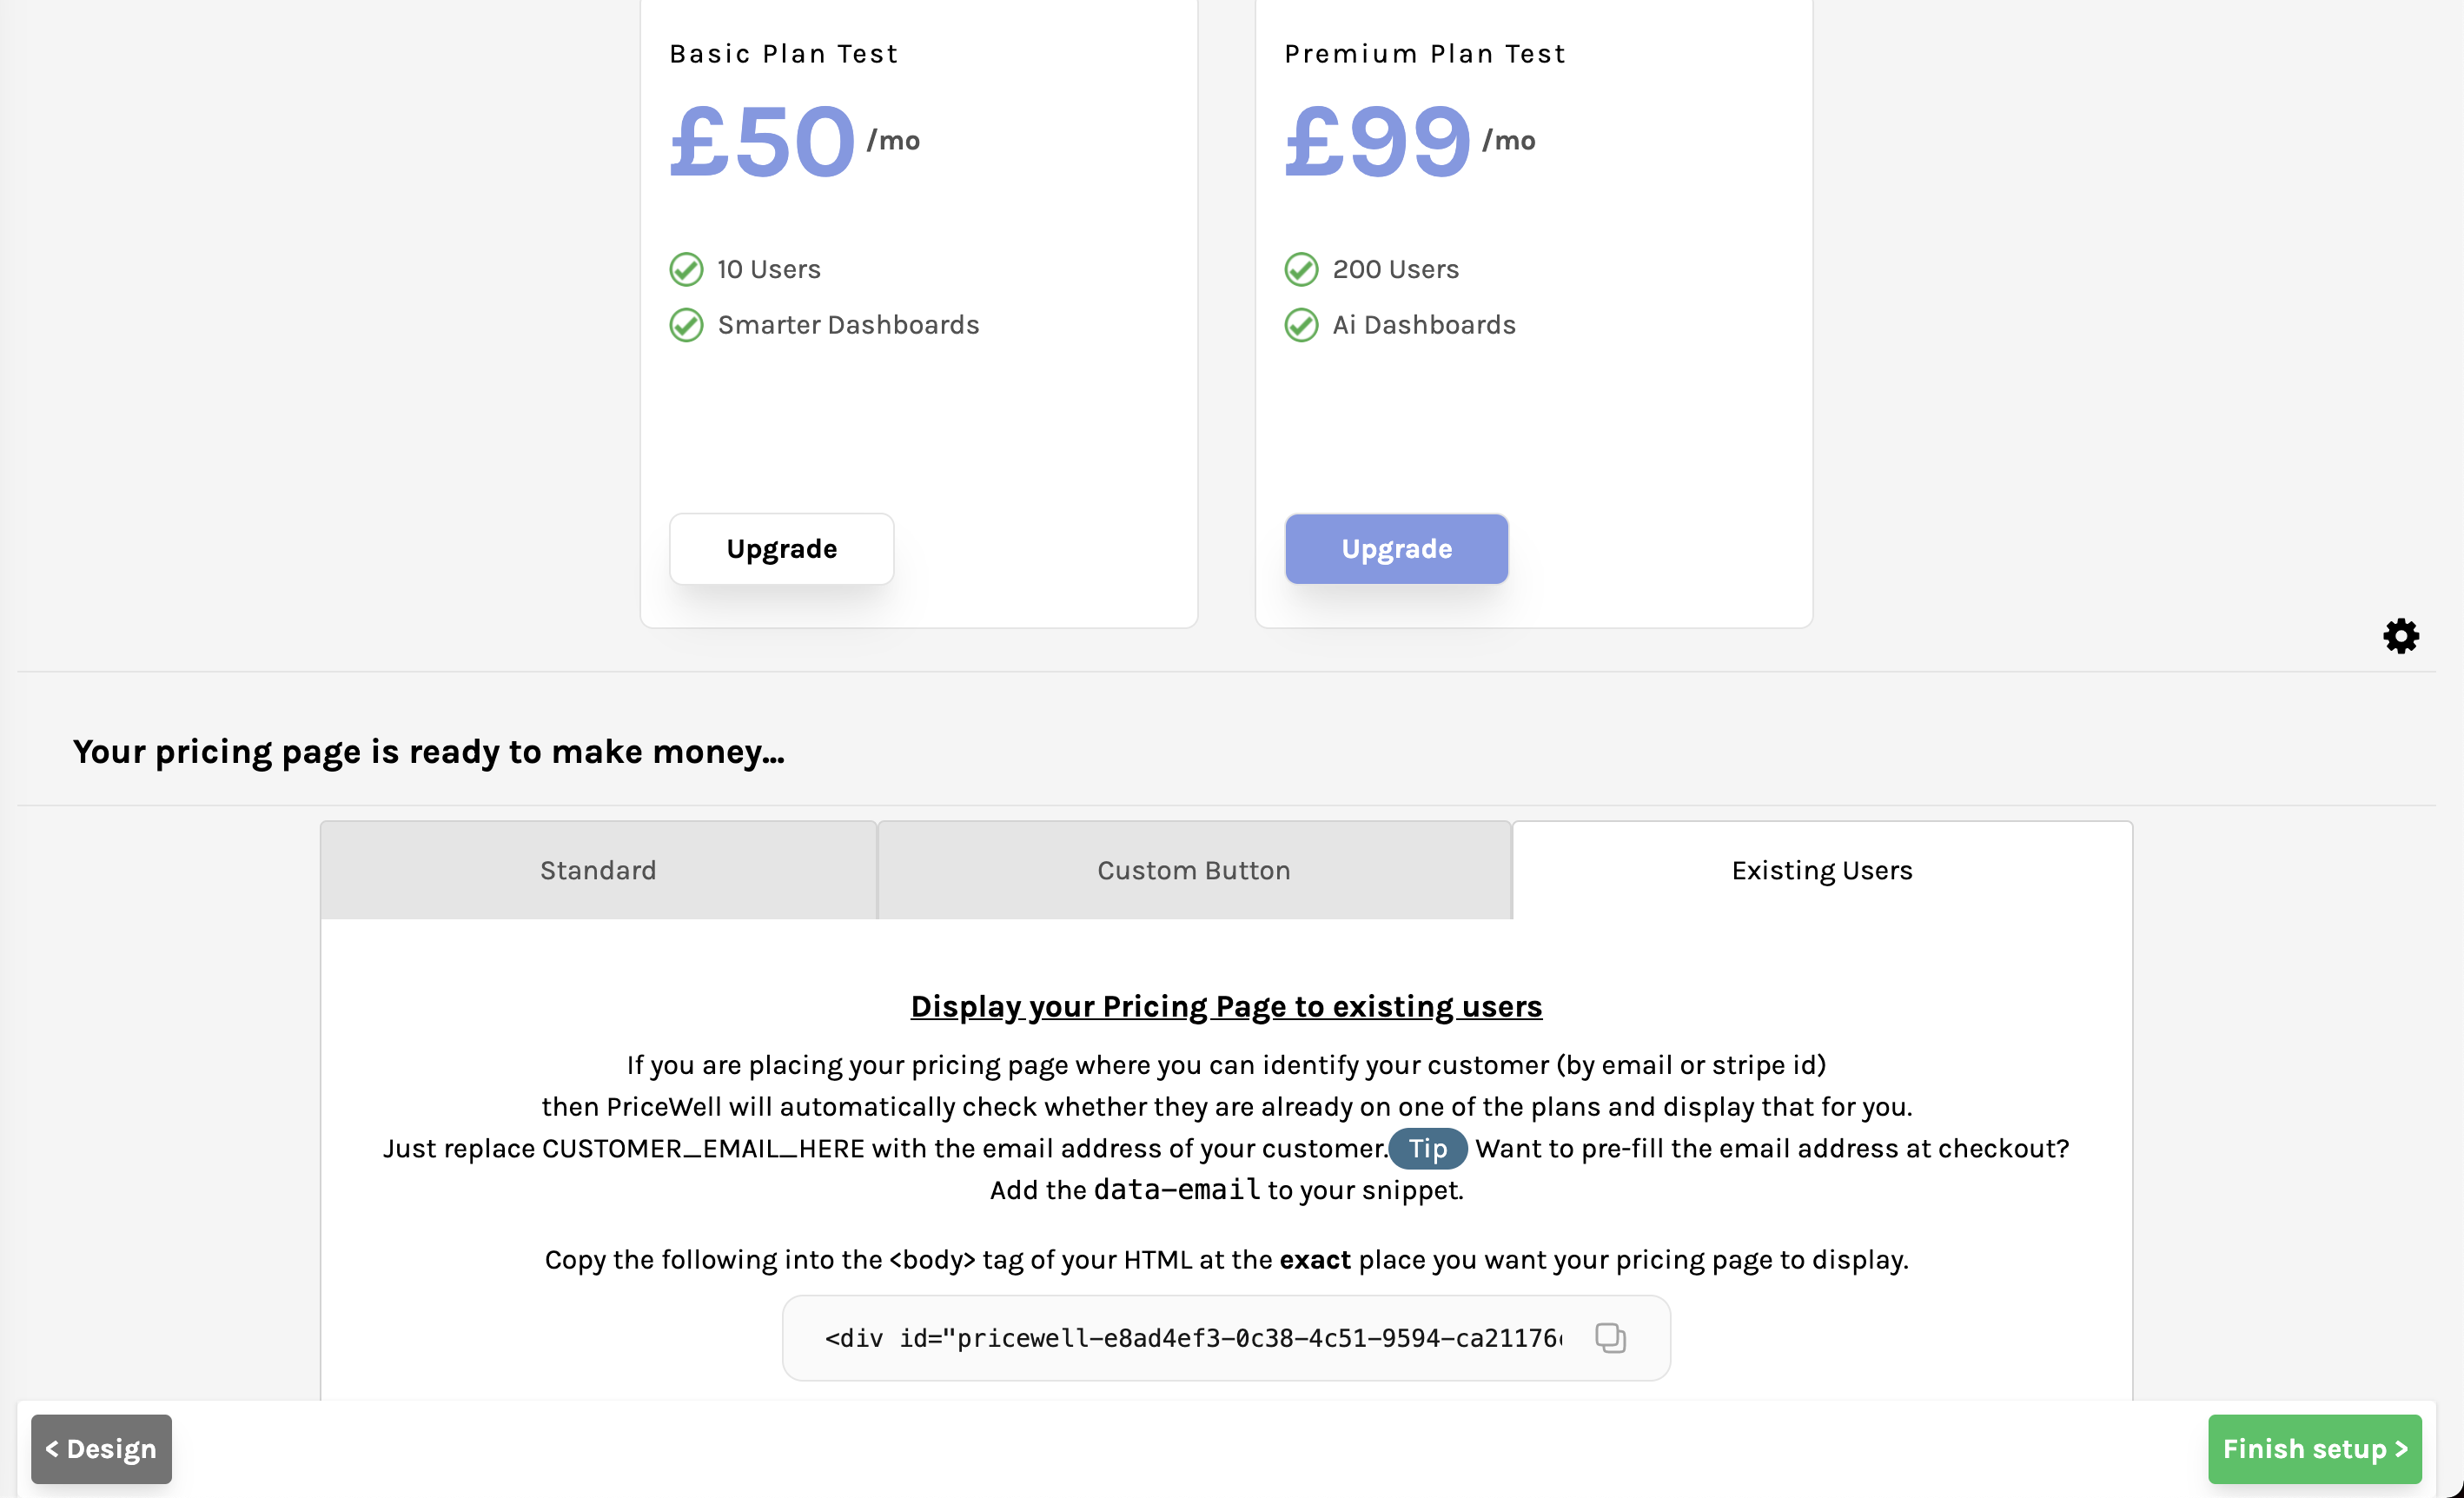
Paste the snippet into the HTML value of the element and Insert Dynamic Data to get your customer’s email address. This will ensure that Stripe Checkout pre-fills the email address during checkout (so we can match it later when the subscription is created).
Step 3: Add subscription data to Bubble Things
We’ll add a couple of new fields to the User in Bubble (you can add this to a Company if you have one) to keep track of the Stripe customer and subscription (so we know when to let the customer update/subscribe).
Create two new fields to User:
| Name | Type |
|---|---|
| Stripe Customer Id | text |
| Stripe Subscription Id | text |

Step 4: Make the Customer Portal show when the User has a Subscription
Head back to the page in bubble that has the HTML element containing our Pricing Page snippet.
Now add a Conditional step so that the HTML changes when the Current User has a Stripe Subscription Id (we’ll be doing this in the next step).
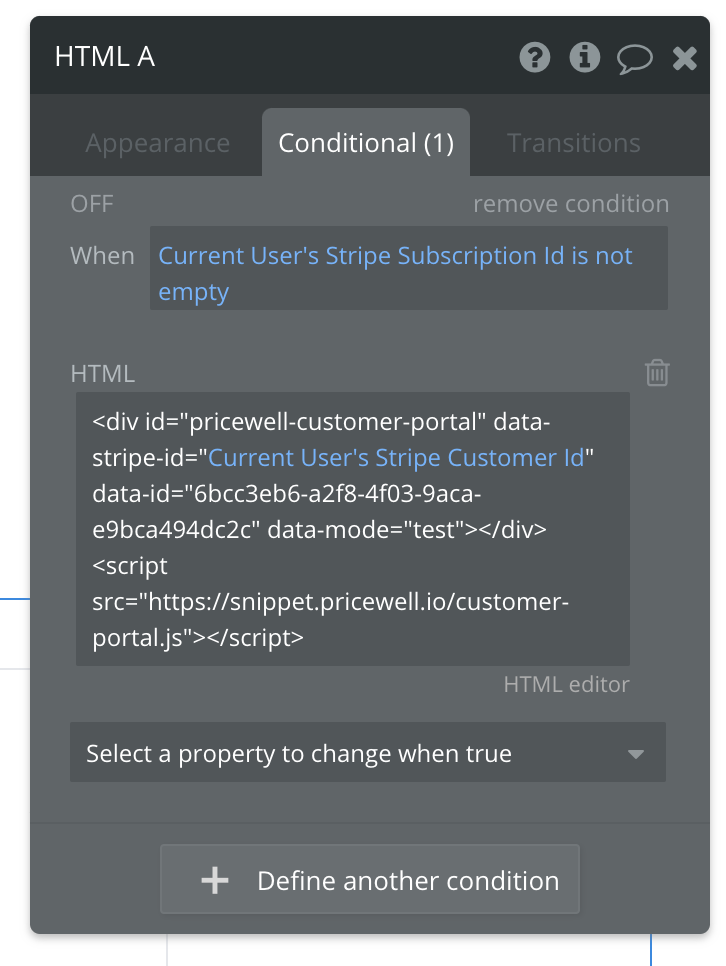
When the Stripe Subscription Id is not empty (that means the customer has a Stripe subscription), we want the HTML of the element to change. Copy the snippet for your PriceWell Customer Portal (choose the Stripe Id tab) and paste it in (where is says Choose a Property to Change, select HTML). Then use Insert Dynamic Data to put the Current User’s Stripe Id between the quotes in data-stripe-id=""

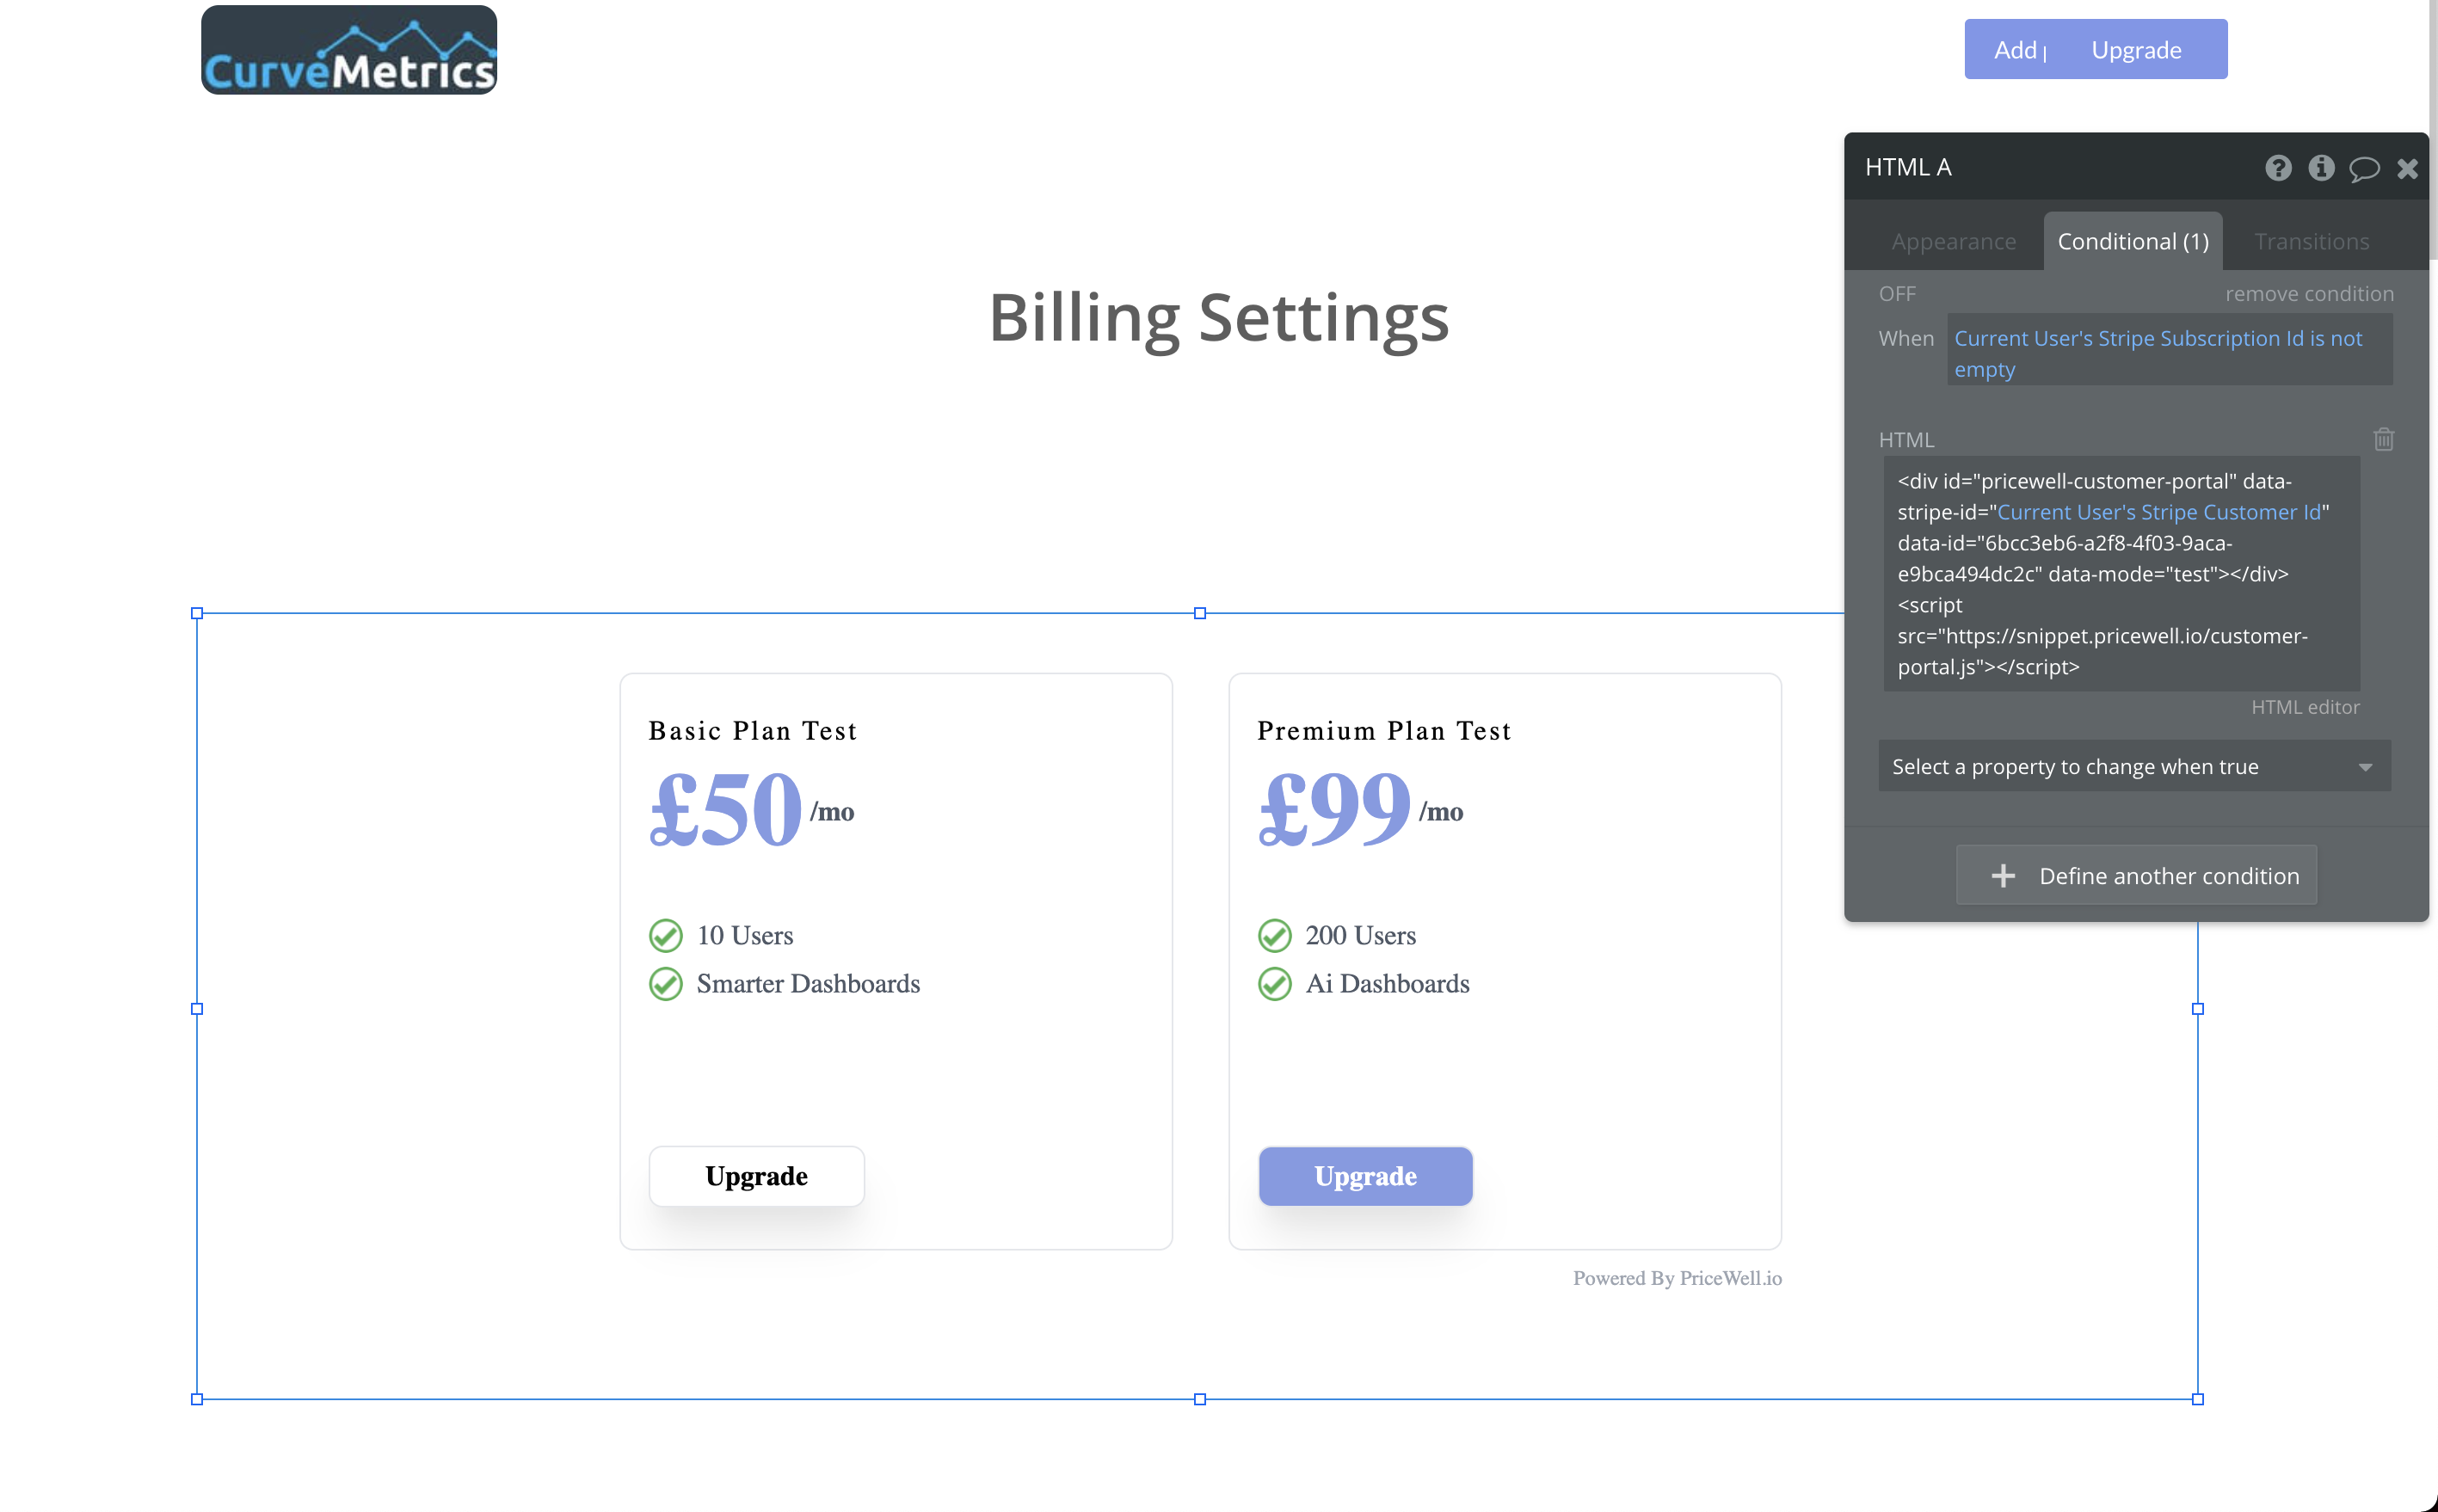
Your preview should look something like this. Note that your Pricing Page is still displayed because the preview doesn’t have a Stripe Subscription Id set.
Step 5: Set the Stripe Ids when a subscription is created or deleted
We’re going to use two Bubble concepts here (please read the documentation if you aren’t familiar with them):
Backend Workflows (docs)
API Connector (docs)
Install API Connector and create a new API
We need to create a custom API in order to get some information from Stripe (you’ll see why in a moment).


Set the following fields:
| Field | Value |
|---|---|
| API Name | Stripe Customer |
| Authentication | HTTP Basic Auth |
| Username | You Stripe Test Secret Key (docs) |
| Password | Blank |
| Name | API Call |
| Use as | Action |
| Data type | JSON |
| Method | GET |
| Url | [https://api.stripe.com/v1/customers/[stripeCustomerId]](https://api.stripe.com/v1/customers/[stripeCustomerId]) |
| URL parameters - Key | stripeCustomerId |
| URL parameters -Value | (enter an example customer id from Stripe here) |
| URL parameters - Private | unchecked |
| URL parameters - Allow blank | unchecked |
Press Initialize call and the fields will be populated.
We will use this API in the next step
Step 6: Configure Backend Workflows
Now we need to configure a backend workflow to listen to changes from Stripe and update our User. For this, we are going to use Stripe Webhooks (docs)
Go to Backend Workflows in Bubble (make sure your plan has this enabled)

Create a new API Workflow
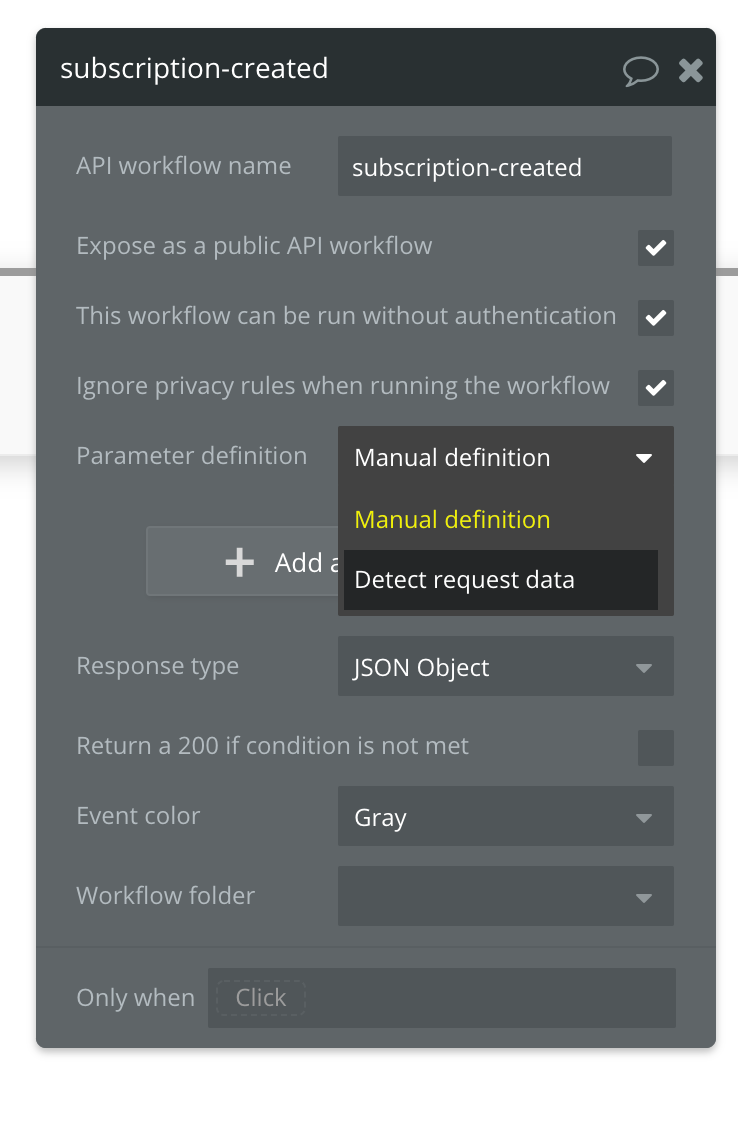
Configure the parameters as follows:
| Parameter | Value |
|---|---|
| API Workflow name | subscription-created |
| Expose as public API workflow | checked |
| This workflow can be run without authentication | checked |
| Ignore privacy rules when running the workflow | checked |
| Parameter definition | Detect request data |
You will be shown a popup containing a URL. Copy the URL to your clipboard
Now open a new browser tab and visit https://dashboard.stripe.com/test/webhooks
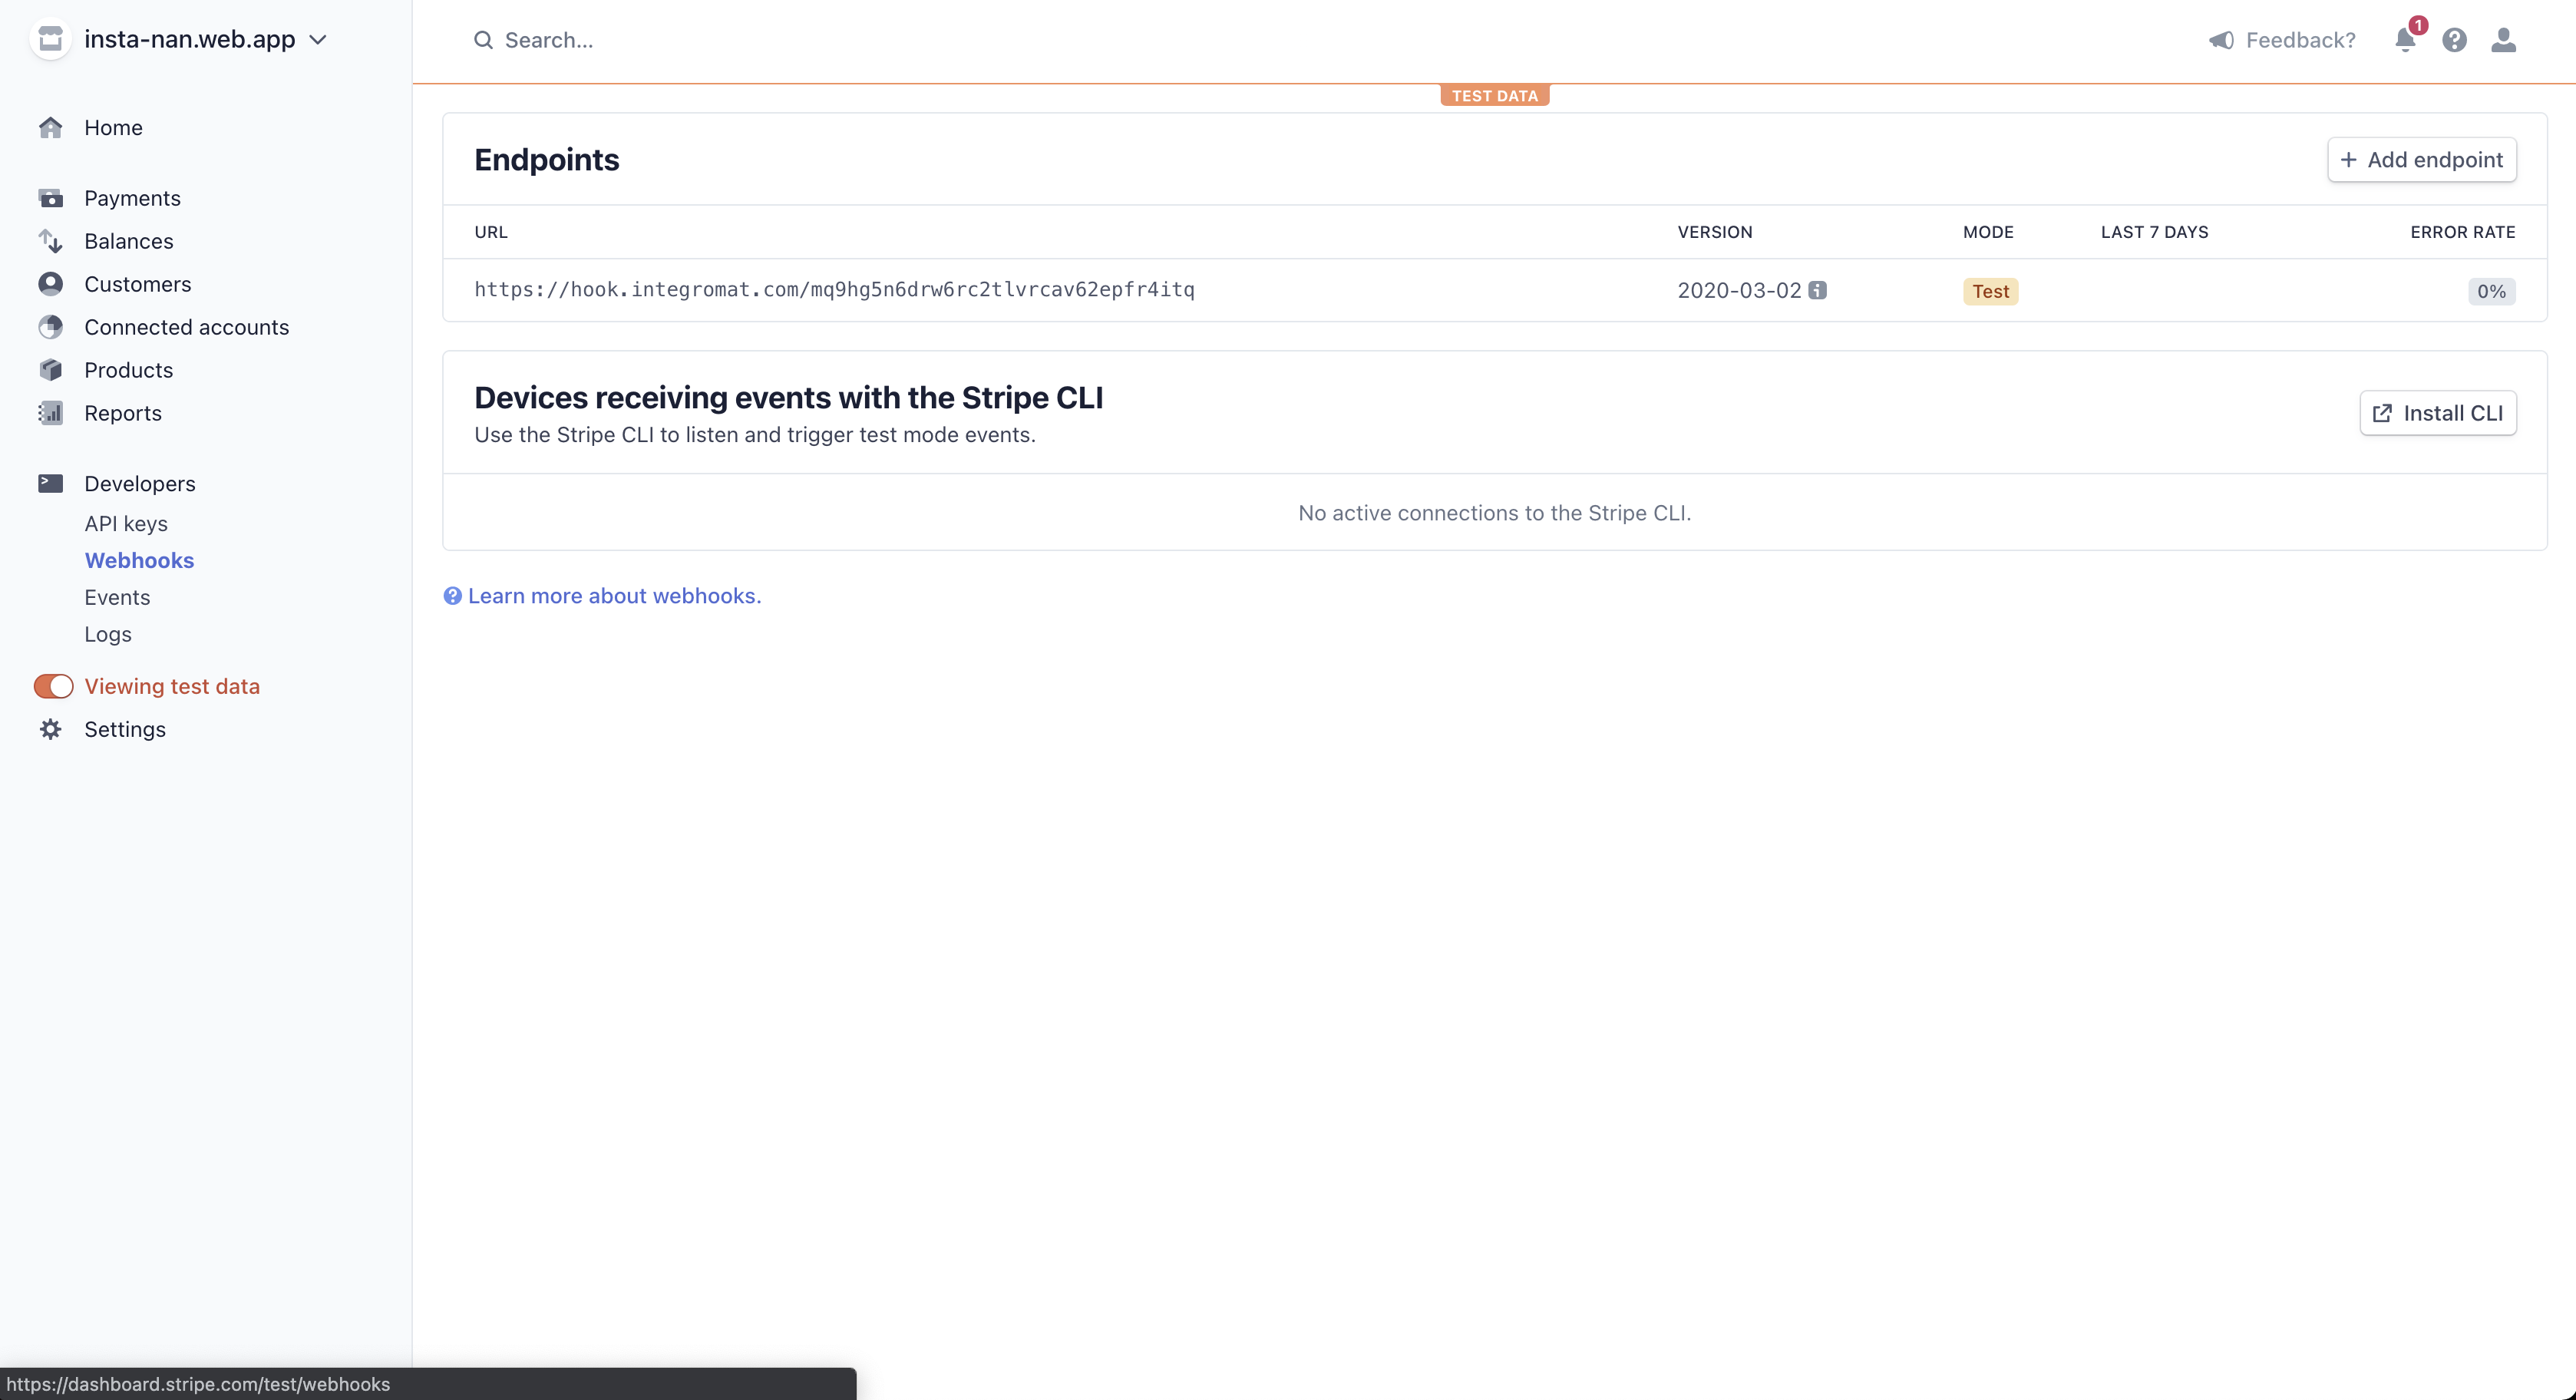
Click “Add endpoint”

Paste the URL from Bubble into “Endpoint URL” and under “Events to send” select customer.subscription.created. Then click “Add endpoint”.

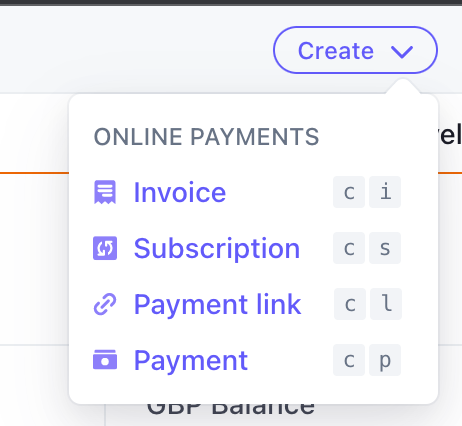
Now test your webhook by creating a new subscription from the Stripe dashboard. Go to Create -> Subscription
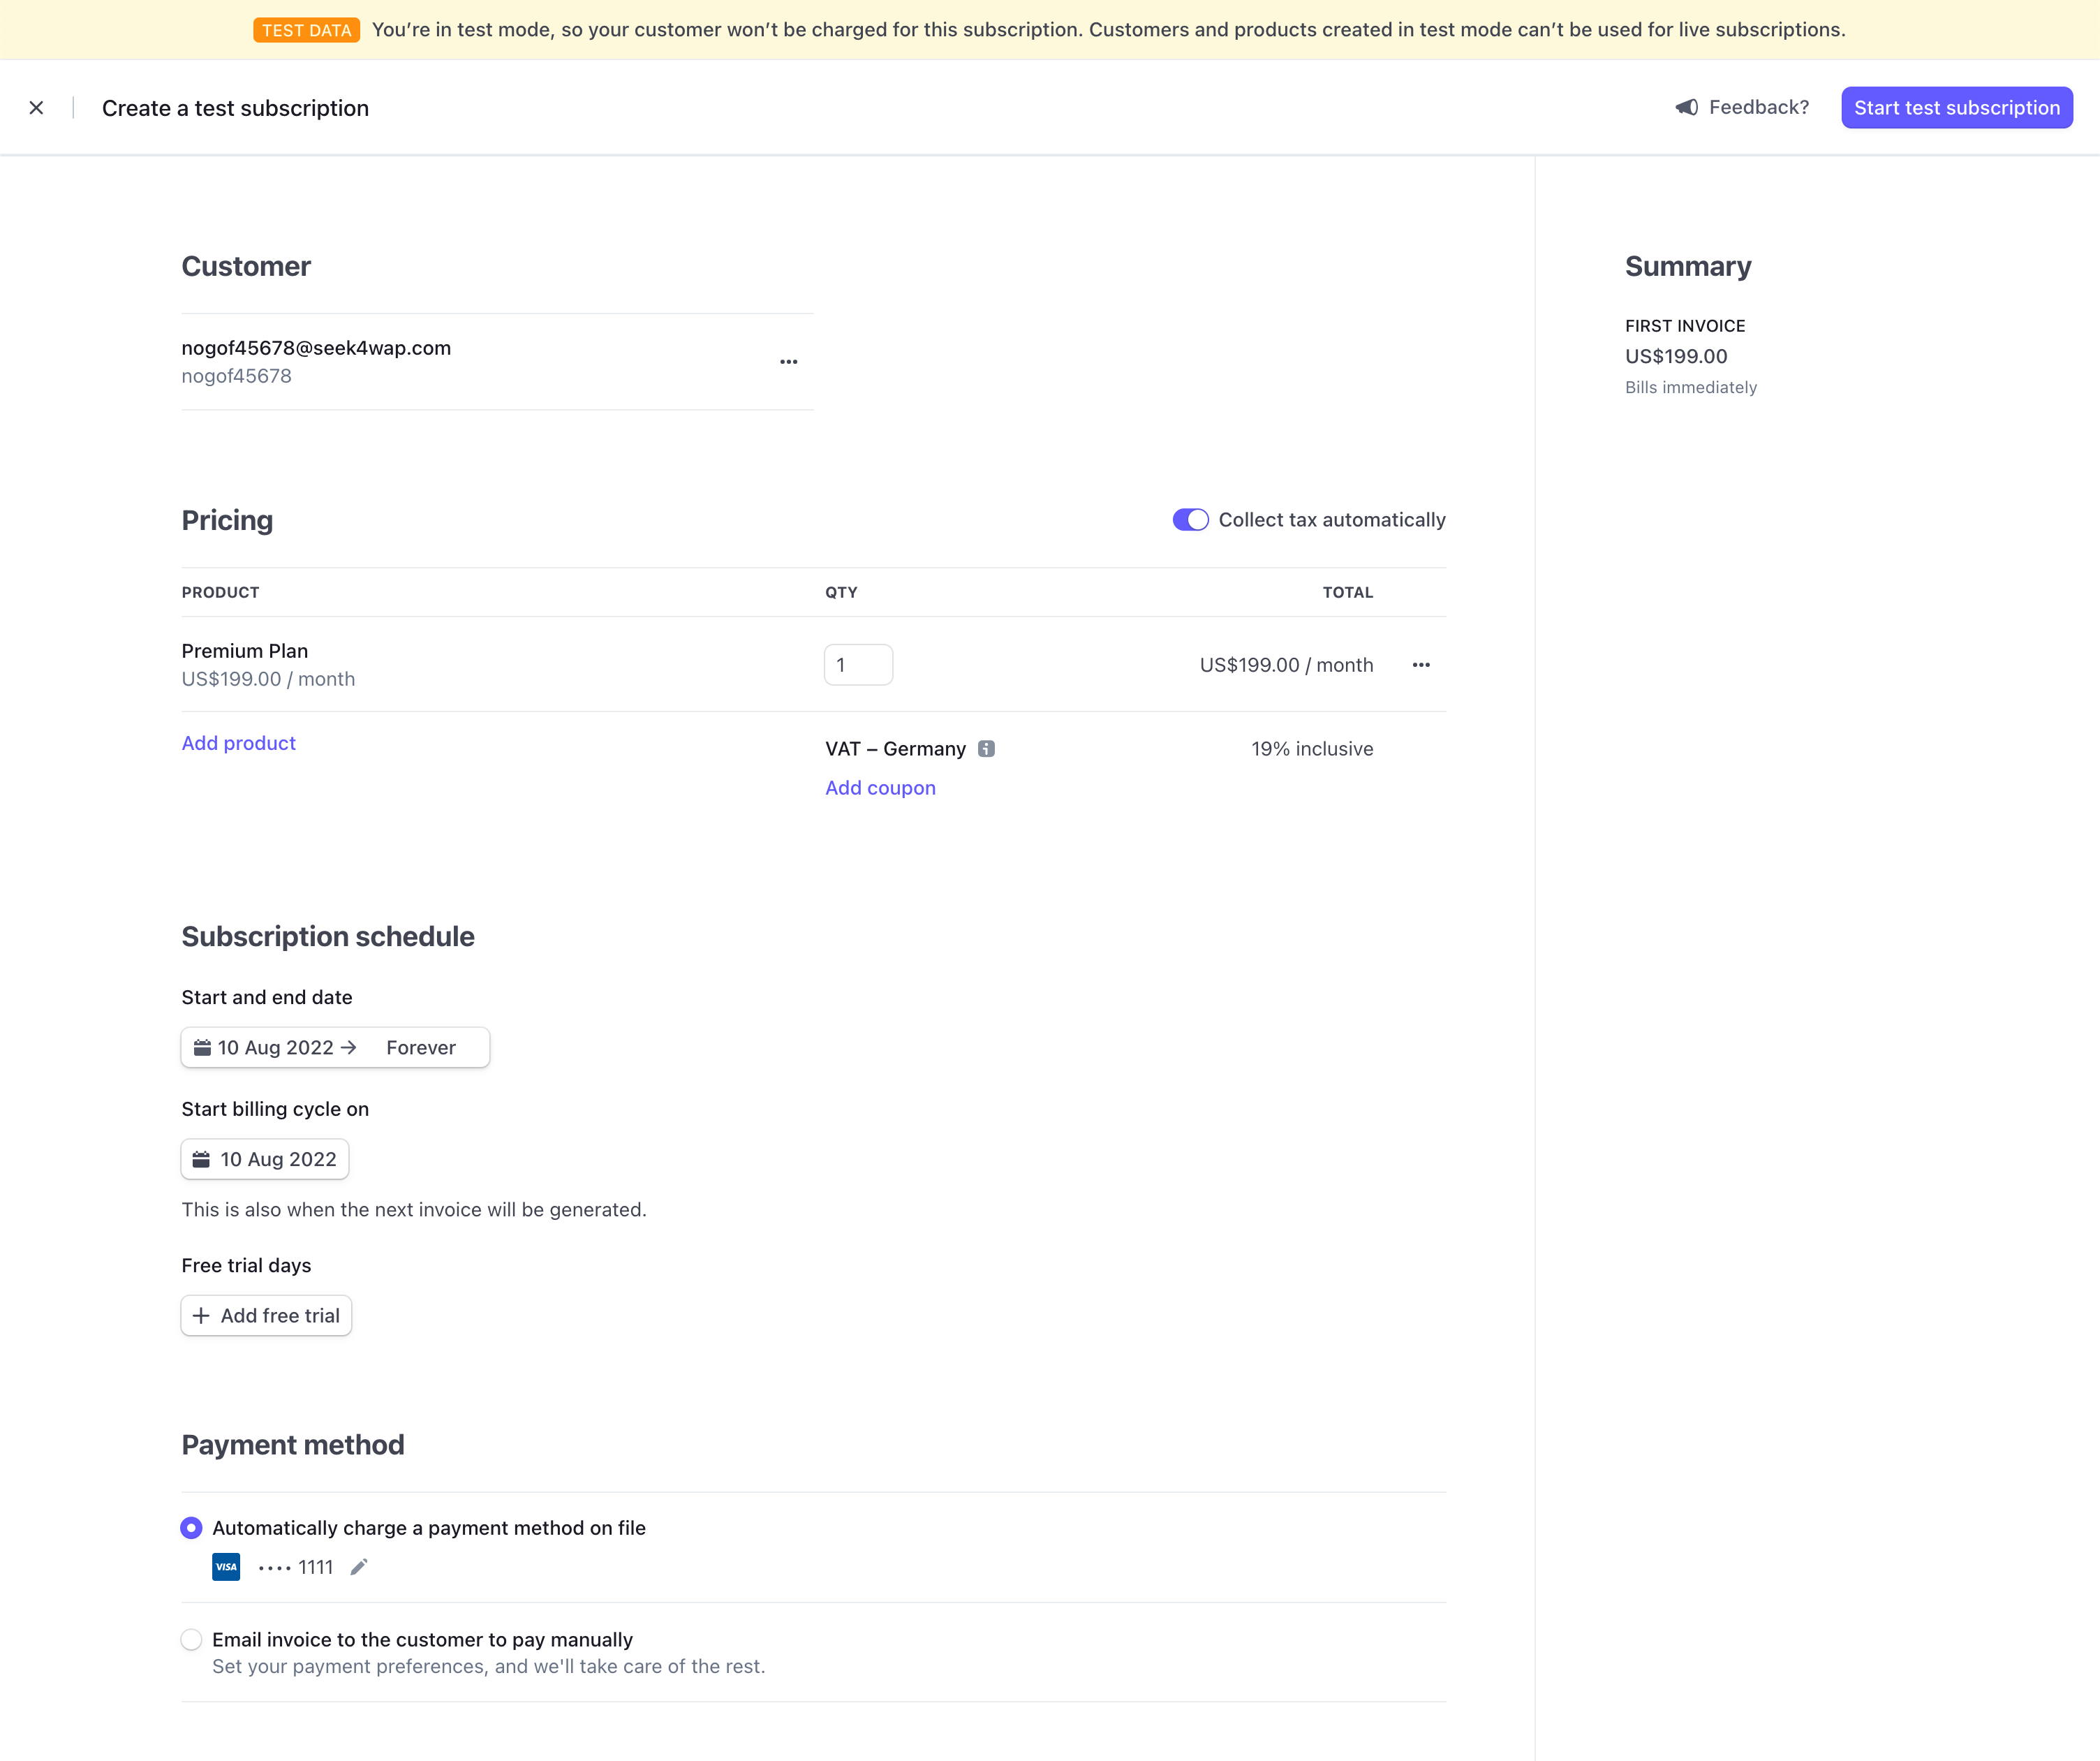
Choose a customer and product (make sure you are in Stripe’s test mode) and click “Start test subscription”.
Go back to your Bubble browser tab. It should have detected the request data and show the following. If the data is not showing in Bubble, go back to Stripe, open the subscription and check the events to make sure a webhook was triggered.

Press “Save”.
Now go back to Stripe and update the webhook to remove “/initialize” from the end of the URL. This part is only used for detecting the data.

Back in Bubble, add a Step 1 to your Backend Workflow called subscription-created
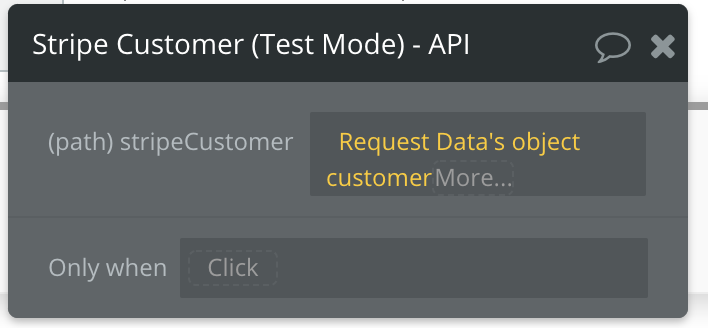
Under “Plugins” choose your custom API.
For (path) stripeCustomer select Dynamic Data and choose RequestsData’s -> object customer
This will fetch the Stripe Customer for use (who has the email address we need to match the correct User).
Add a Step 2 to your workflow.
Choose Data (Things) -> Make changes to -> Search for Users
Search for Users where email = Result of step 1’s-> email
Get the first item (because Search returns a list of things but we know there’s only one).

In the same step (Step 2)
Update the following properties of the User
Stripe Subscription Id = Request Data’s -> object id
Stripe Customer Id = Request Data’s -> object customer
This will set both the customer id and subscription id from Stripe on our User (meaning that the Customer Portal will display for them, not the Pricing Page). The workflow runs as soon as the Subscription is created so it will work as soon as the user finishes the checkout.

Now perform the same steps for a new API workflow called subscription-deleted
Create a new Stripe Webhook Endpoint and this time listen for the customer.subscription.deleted event.
We don’t need to look up the Stripe Customer using our custom API this time (because the User should already have the Stripe Subscription Id field set, we can match on that).
Add a single step (Step 1)
Search for Users where
Stripe Customer Id = Request Data’s -> object customer
Update the Stripe Subscription Id field to be empty. This means the Pricing Page will display instead of the Customer Portal as the user no longer has a subscription.

Step 7: Going Live
In order for this workflow to work in Stripe’s live mode, you need to do a few things
- Set your Pricing Page to live in PriceWell
- Go back to Steps 5 and 6 and replace Test with live (i.e your Live secret key and configure the webhook in Stripe Live mode)